SUPPORT
Ayre Acoustics, Inc.
6268 Monarch Park Place
Suite B
Niwot, Colorado 80503
USA
Phone: +1.303.442.7300
We enjoy talking with you and answering your questions about Ayre products. We find that phone conversations are much faster and more efficient at answering your question than typing emails, please feel free to give us a call.
We find that a phone conversation is usually the easiest way to answer your questions. If it is easier for you to send your question via email, click here.
We offer all of our product literature online via the “Reviews & Literature” link on each product page. If you would like to receive a printed copy of this literature or if you have any questions regarding Ayre components, please give us a call at the number above.
If you live outside of North America, please contact your local distributor for printed literature.
Here you can find digital copies of all the Ayre owner’s manuals. Each manual contains a lot of valuable information including troubleshooting common issues. If you need help with service or have a question about anything in your product’s manual, please give us a call.
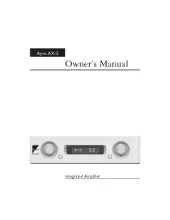
AX-5 Twenty
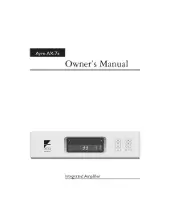
AX-7e
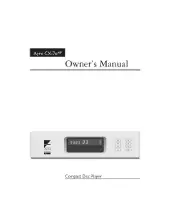
C-5xeMP

Codex

CX-7eMP
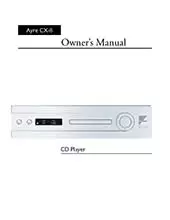
CX-8
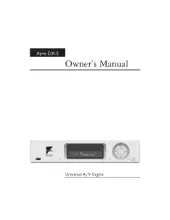
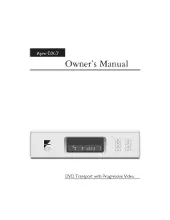
DX-5 DSD
DX-7e
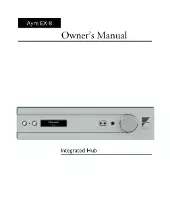
EX-8
K-1xe

K-3x

K-5xeMP
KX-5 Twenty
KX-R Twenty

MX-R Twenty
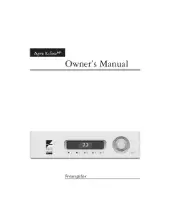
P-5xe
QA-9

QB-9 DSD

QX-5 Twenty
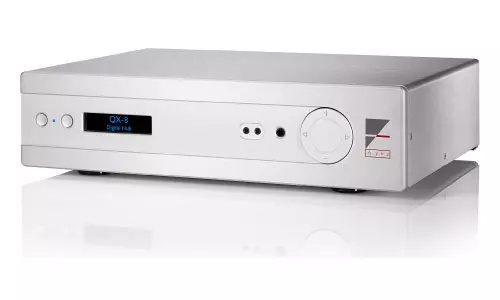
QX-8
V-1xe

V-3x

V-5xe

V-6xe

VX-5 Twenty
VX-R Twenty
RC-30 Remote Control
Firmware
Please choose from one of the images below to access the latest firmware and installation instructions for your Ayre product.
DX-5 Firmware
EX-8 Firmware

QX-5 Firmware
QX-8 Firmware
DX-5
Ayre DX-5DSD Universal A/V Engine Firmware Update |
|
Release Information:
Release date: March 13, 2012. Main Version: AYDX5-59-0117 Release Notes:
This firmware version is designed only for the Ayre DX-5. Comparing to the previous official release version AYDX5-58-1215, this version focuses on improving the physical disc compatibility:
All features and improvements of the previous firmware are also included in this version.
Firmware Upgrade Instructions:
Warning: Although firmware upgrade is an easy and usually trouble-free process, it is important to ensure that the power supply to the player is stable, and the upgrade process is not interrupted. A failed firmware upgrade can render the player unusable. There are three ways to upgrade the firmware. If your player has an Internet connection, the easiest way to upgrade the firmware is the “Via Network” method. If you have a USB thumb drive, you may choose the “Via USB” method. You can also use the “Via Disc” method by preparing a firmware upgrade CD yourself or requesting a firmware CD from Ayre customer service. Please follow one of the three procedures below based on the upgrade method chosen.
Firmware Upgrade via the Internet
Firmware Upgrade via a USB Thumb Drive
Firmware Upgrade via CD
General instructions on working with ISO image files Note: These are general instructions on how to burn the firmware CD with common CD burning software. Please consult your CD burning software’s help/instruction manual for more detail.
|

Contact Ayre Support: +1 (303) 442-7300
EX-8
Ayre EX-8 Integrated Hub Firmware Update
Release Information:
Release date: April 6th, 2020.
Category: Latest Official Release
SYS Firmware Version: 01.06.00
DSP Firmware Version: 01.05.00
NET Firmware Version: 03.06.71
For a list of previous revisions, click here.
Release Notes:
Compared to the previous official release, this release includes changes to the volume control position detection and display, SPDIF source reception, and internal clock switching.
Bug Corrections:
- AES/SPDIF/TOS sources should now reliably lock in all cases.
- Small audible ticks/pops should be reduced when rate/type switching.
- Volume display should now not change when no physical volume change has been made.
- Removed a timing conflict that could lead to non-detection of the Network module.
Improvements:
- Responsiveness of the Volume display “wake-up” has been improved.
The current firmware revisions of an EX-8 can be found in the setup menu.
1) Place the EX-8 into System-sleep mode, indicated by a Green Status LED. If the unit is in active mode, simply press and hold the left button on the front of the unit.
2) Once in System-sleep mode, press and hold the right button on the front of the unit until the display shows “Setup Menu”. The menu may also be accessed by pressing the wrench icon on the remote.
3) In the setup menu, pressing the right button will adjust your current selection, a quick press of the left button will select the current selection, and a long press of the left button will return to the previous screen. The menu may also be navigated using the remote.
4) Navigate to “System” and then to “FW Revisions” to see all current firmware versions.
5) If any firmware versions shown do not match those above, you may use the following methods to update your unit.
Firmware updates may be made available for the EX-8. These updates may provide new features and/or improve the use and reliability of your unit. There are two types of updates available for the EX-8, general and network. General (SYS and DSP) updates may be performed using a USB flash drive or using a network connection if the Network option is installed. Network updates may only be performed using a network connection.
Warning: Although the firmware upgrade is an easy and usually trouble-free process, it is important to ensure that the power supply to the player is stable, and the upgrade process is not interrupted. A failed firmware upgrade can render the player unusable.
Do not turn off the EX-8 while updates are in progress.
Network Updates
Units with SYS firmware 01.03.00 and earlier will not be able to update general firmware over the network. Please use the USB firmware update method below.
If an EX-8 is equipped with the Network option, all firmware files can be downloaded and installed using a network connection.
When the unit is first powered on, or whenever it is placed into System-sleep mode, the EX-8 will automatically check for any available firmware updates. If an update is found, the EX-8 will request permission to download it. You may also manually check for firmware updates by entering the Setup menu, navigating to Network and then to Check for Updates. After selecting Yes, the unit will begin downloading and installing ALL available updates.
The progress of the update will be tracked on the screen. This may take up to 30 minutes to complete, depending on your internet connection and the size of the update.
Once completed, the unit may need to reboot to finalize the installation.
Updating Firmware with a USB Flash Drive  DOWNLOAD
Using a USB flash drive, the SYS and DSP firmware files may be updated. These files affect the firmware for the unit’s operating system, display, digital filters, etc.
1) The latest USB update files for the EX-8 may be downloaded from the DOWNLOAD link above.
2) Before copying any new files to your flash drive, be sure to delete any instances of an “EX8boot” folder from your flash drive before continuing. Any previous firmware images can prevent the update from working.
3) Extract the compressed folder EX8_firmware.zip downloaded above. Find the folder named “EX8boot” and copy it directly into the root directory of your flash drive. It is important that this folder is placed directly into the root directory of the flash drive, that it is spelled correctly, and that there are no numbers appended to it (e.g. “EX8boot (1)” will not work).
4) Find the rocker switch on the back panel of the unit and switch it to “OFF”.
5) Insert the USB flash drive into the port labeled “Firmware Update” on the back panel.
6) Turn the rocker switch on the back panel of the unit to “ON”. The firmware update will commence automatically. While the unit is updating itself, the display will show “Installing Update” and the status LED will pulse. When complete, the unit will display “EX-8 Integrated Hub” then return to system-sleep mode.
7) Remove the USB flash drive from the back of the unit. If it is accidentally left in, the unit will re-update itself every time it is turned on.
Contact Ayre Support: +1 (303) 442-7300
QX-5
Ayre QX-5 Digital Hub Firmware Update
Release Information:
Release date: February 15, 2023
Category: Latest Official Release
General Firmware Version: R
Network Firmware Version: 03.06.71 (NET 1) and 04.03.40 (NET 2)
For a list of previous revisions, click here.
Release Notes:
Fixes identification as ROON certified device.
Firmware Updates:
Firmware updates may be made available for the QX-5 Twenty. These updates may provide new features and/or improve the use and reliability of your unit. There are two types of firmware updates that are available for the QX-5 Twenty.
Do not turn off the QX-5 Twenty while updates are in progress.
Firmware Upgrade Instructions:
Warning: Although the firmware upgrade is an easy and usually trouble-free process, it is important to ensure that the power supply to the player is stable, and the upgrade process is not interrupted. A failed firmware upgrade can render the player unusable.
Network Updates
Network updates only affect the network module of the QX-5. Whenever the QX-5 Twenty is switched from standby to operation mode, the installed network device will connect with the Ayre webserver to check for a network update. If an update is available, the unit will show the word UPDATE? in the display. Choose either to begin the upgrade by pressing the right-hand button (illuminated green) or cancel the update by pressing the left-hand button (illuminated red). If the update is canceled, note that the QX-5 will ask to update the network module every time it is taken out of standby mode. As it is important to stay current with updates, there is no way to permanently cancel an update check.
If you press the right-hand button, the update will begin and the word UPDATING along with numbers (5…10…15…etc.) will appear on the display, showing the progress of the update until complete at 100, and the display will read UPDATE DONE.
General Firmware Updates DOWNLOAD
General updates affect the firmware for the unit’s operating system, display, digital filters, etc. The general firmware of the QX-5 Twenty may be updated for ease of use and reliability. The unit’s firmware version can be found by accessing the Setup Menu.
1) Enter the Setup Menu, from MAIN INPUT, scroll to the right (using the right arrow on the control ring) until you see FW REV.
2) Press the right-hand button and the firmware version will be displayed as “FW-X xx.xx.xx”. The letter following “FW-” is the general firmware revision. The “xx.xx.xx” portion shows the network firmware revision.
3) If the QX-5 Twenty’s firmware version does not match the version listed next to the General Firmware Version at the top of this page, then download the new version from the DOWNLOAD link above.
4) Delete any instances of a QX5boot folder from a USB flash drive if it already exists. Extract the QX5boot folder from the QX5boot.zip file and save the folder and all of its contents to the root directory of the USB flash drive. It is very important that this folder appears at the root level of the flash drive or the QX-5 will not recognize it. Be sure to copy the FOLDER inside the QX5boot.zip file to the USB flash drive and not the .zip file, itself or the QX-5 will also fail to read the file correctly. Ensure that the folder name is (case sensitive) “QX5boot” without the quotes and with no numbers following the name.
5) Find the rocker switch on the back panel of the unit and switch it to “OFF”.
6) Insert the USB flash drive into the port labeled “Firmware Update” on the back panel.
7) Turn the rocker switch on the back panel of the unit to “ON”. The firmware update will commence automatically. While the unit is updating itself, either the left-hand button will be illuminated red or the display will read “Updating…”, depending on when the unit was built. When complete, the unit will return to system-sleep mode.
8) Return the unit to operation mode by pressing the right-hand button.
9) Remove the USB flash drive from the back of the unit. If it is accidentally left in, the unit will re-update itself every time it is turned on.
Contact Ayre Support: +1 (303) 442-7300
QX-8
Release date: April 15th, 2019.
Category: Latest Official Release
SYS Firmware Version: 01.02.00
DSP Firmware Version: 01.05.00
NET Firmware Version: 03.06.47
Release Notes:
This firmware is designed only for the Ayre QX-8. Compared to the previous release, this version fixes an intermittent popping issue when changing sample rates and improves S/PDIF input lock time.
Bug Corrections:
- An intermittent pop caused by sample rate changes has been resolved.
Improvements:
- Lock time when changing S/PDIF sample rates or inputs has been improved.
The current firmware revisions of a QX-8 can be found in the setup menu.
1) Place the QX-8 into System-sleep mode, indicated by a Green Status LED. If the unit is in active mode, simply press and hold the left button on the front of the unit.
2) Once in System-sleep mode, press and hold the right button on the front of the unit until the display shows “Setup Menu”. The menu may also be accessed by pressing the wrench icon on the remote.
3) In the setup menu, pressing the right-hand button will adjust your current selection, a quick press of the left-hand button will select the current selection, and a long press of the left-hand button will return to the previous screen. The control ring on the right side of the faceplate may also be used to adjust your current selection. The menu may also be navigated using the remote.
4) Navigate to “System” and then to “FW Revisions” to see all current firmware versions.
5) If any firmware versions shown do not match those above, you may use the following methods to update your unit.
Firmware updates may be made available for the QX-8. These updates may provide new features and/or improve the use and reliability of your unit. There are two types of updates available for the QX-8, general and network. General (SYS and DSP) updates may be performed using a USB flash drive, or using a network connection if the Network option is installed. Network updates may only be performed using a network connection.
Warning: Although the firmware upgrade is an easy and usually trouble-free process, it is important to ensure that the power supply to the player is stable, and the upgrade process is not interrupted. A failed firmware upgrade can render the player unusable.
Do not turn off the QX-8 while updates are in progress.
Network Updates
If a QX-8 is equipped with the Network option, all firmware files can be downloaded and installed using a network connection.
When the unit is first powered on, or whenever it is placed into System-sleep mode, the QX-8 will automatically check for any available firmware updates. If an update is found, the QX-8 will request permission to download it. You may also manually check for firmware updates by entering the Setup menu, navigating to Network and then to Check for Updates. After selecting Yes, the unit will begin downloading and installing ALL available updates.
The progress of the update will be tracked on the screen. This may take up to 30 minutes to complete, depending on your internet connection and the size of the update.
Once completed, the unit may need to reboot to finalize the installation.
Updating Firmware with a USB Flash Drive DOWNLOAD
Using a USB flash drive, the SYS and DSP firmware files may be updated. These files affect the firmware for the unit’s operating system, display, digital filters, etc.
1) The latest USB update files for the QX-8 may be downloaded from the DOWNLOAD link above.
2) Before copying any new files to your flash drive, be sure to delete any instances of a “QX8boot” folder from your flash drive before continuing. Any previous firmware images can prevent the update from working.
3) Extract the compressed folder QX8_firmware_xx_xx_xx.zip downloaded above. Find the folder named “QX8boot” and copy it directly into the root directory of your flash drive. It is important that this folder is placed directly into the root directory of the flash drive, that it is spelled correctly, and that there are no numbers appended to it (e.g. “QX8boot (1)” will not work).
4) Find the rocker switch on the back panel of the unit and switch it to “OFF”.
5) Insert the USB flash drive into the port labeled “Firmware Update” on the back panel.
6) Turn the rocker switch on the back panel of the unit to “ON”. The firmware update will commence automatically. While the unit is updating itself, the display will show “Installing Update” and the status LED will pulse. When complete, the unit will display “QX-8 Integrated Hub” then return to system-sleep mode.
7) Remove the USB flash drive from the back of the unit. If it is accidentally left in, the unit will re-update itself every time it is turned on.
Contact Ayre Support: +1 (303) 442-7300
USB Driver
Installing the Ayre USB Driver for Windows
Windows operating systems 10 and later include a native USB driver which allows “High Speed” (“Enhanced”, USB 2.0) mode for streaming audio above 96 kHz through the USB ports.
The Ayre USB driver allows Windows computers to play Raw or “Native” DSD files which are not supported by the Windows USB driver.
Installation Instructions
Before beginning this installation process, be sure to uninstall any other ASIO drivers (such as ASIO4ALL) that you may have previously installed. If both drivers are installed, there will be conflicts, and your computer will not operate properly.
First, if your USB D/A converter is currently connected to the computer, please disconnect the USB cable that connects the computer and D/A converter, and follow the instructions for driver installation. Download the Ayre USB driver, version 5.20.0 (link at the bottom of this page) to a convenient location, possibly your desktop, or perhaps to a folder you have created for audio applications.
Unzip the file and open the new folder to locate the application named “setup” or “setup.exe”. After double-clicking to open the file, Windows will ask for permission to allow the program to make changes to your computer. Click “Yes”.
Click “Next” through the following screen to proceed with the installation.
Setup will then ask for you to connect the device and click “Next”. Be sure that your Ayre product is connected to AC power BEFORE connecting the USB cable from the D/A converter to a High Speed (“Enhanced”, USB 2.0) USB port on your computer. Click “Next”.
Click “Install” on the following screen to install the driver.
Click “Next” when prompted.
Click “Finish” to complete the driver installation.
After installation is complete, you will see a pop-up saying that Windows has protected your PC. The file it is preventing from running is the cleanup file that erases the temporary files on your hard drive for the installation process. To let this file run, click the “More info” link and then select “Run Anyway”.
You will then see a flashing shield icon in the bottom taskbar flashing. Clicking this, you will have a User Account Control window open up asking for permission to run CNE7F17.tmp. Click “Yes” on this window to clean up the installation files.
Contact Ayre Support: +1 (303) 442-7300
Online Registration Coming Soon…
We are working on a system to register Ayre products online. For now, please fill out and return the warranty card which came in your box.
If you have any questions, give us a call at + 1 303.442.7300, and we will be happy to talk with you.
Have a question?
Below are some of the most frequent questions we get. Click on the question to see the answer.
If you can’t find the answer you are looking for here, just give us a call. We are always happy to talk to you.
Give us a call/email with the serial number and we can provide all pertinent information about your Ayre component.
Ayre gear has both balanced (XLR) and single-ended (RCA) connections available. (with the exception of the R series which is balanced only) Whenever possible it’s best to use the balanced connections.
When a single-ended source is connected to an Ayre preamplifier, amp, or integrated amplifier, the signal gets converted to balanced at the input of the Ayre.
If your associated equipment is not balanced, it will still work well with Ayre gear and sound great as you will benefit from the balanced topology we use inside our products.
Loudspeakers and cables are a personal choice. Ayre power amplifiers are capable of driving low impedance loads and work well with low to high-efficiency loudspeakers. If you like the sound of a particular pair of speakers or cables, most likely you will enjoy them, even more, being powered by Ayre!
“Listen” is more correct in the time domain and most feel it sounds more musical as timing is an important element in music and conveying emotion. “Measure” is slightly more extended in the high frequencies and will sound more ‘brilliant’ but we think less involving.
There are different ways of upgrading the firmware in your Ayre component. Some Ayre products need a microchip replaced, others use a thumb drive and/or a Network connection. Please visit the support page on the Ayre website for the product you have.
We can service ALL Ayre equipment. Some older models are getting more and more challenging to support due to parts availability. Please call or email and we can discuss your service issue.
Yes, we do replace drives in Ayre CD/DVD players. Call or email and we can talk about the options for replacing the drive in your Ayre CD/DVD player.
Yes, the 5-Year Transferable warranty starts the day your component is shipped from the Ayre factory.
The best way to buy an Ayre product is from your local authorized dealer or distributor. Please check the Ayre website for a dealer near you. A few Ayre products are also available from superphonica.com
Yes, call or email and we can sell you a replacement remote for your Ayre product.
Yes, the Ayre Myrtle wood blocks truly are a nice sonic upgrade from the stock feet. They sound great with Ayre components and under other manufacturer’s products as well. We typically recommend three blocks per unit. We also sell notched blocks with one or two notches for use under cables.
It is called asynchronous because the DAC’s master clock isn’t synchronized directly to any clocks within the computer. Instead, the DAC is controlled by a high-precision fixed-frequency clock. This clock controls the data stream from the computer to a buffer near the DA converter. This provides the lowest possible jitter and best sound.